Who hasn’t needed to create a quick website with repetitive data structures, but thought that adding a database and all the communication logic would be too much?
Static site generators are quick options, and nowadays it’s possible to put one online in minutes. However, when we need to make constant modifications to the site’s content, it becomes difficult to do so without modifying the code. In my case, I needed to share the responsibility of making modifications to the site’s data with a non-technical person who was already accustomed to online spreadsheets.
In this text, I’ll share how I used Google Sheets as a backend for my static site, with deployment on Netlify and periodic updates with Github Actions. To run this project, you’ll need a Google account and a GitHub account (with both you can also log in to Netlify), and, of course, a local Hugo project with a configured template. See a quick guide on how to start here. The commands will be executed in the site folder (Hugo project).
The site for the bazaar
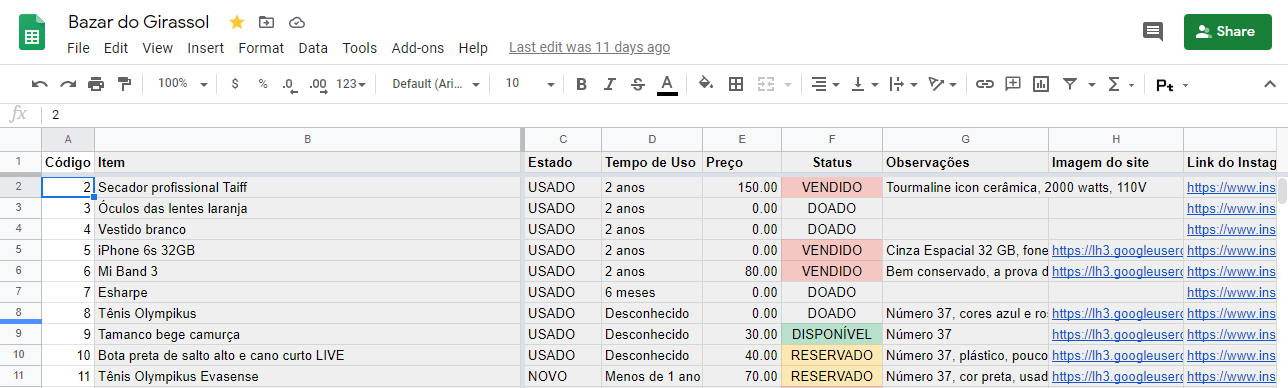
As the only programmer involved in organizing a bazaar, I needed to find a way to keep the site updated quickly without requiring modifications to the repository. For me, Hugo is the tool when it comes to generating static sites, but this time I had some different requirements than I usually do. I needed to:
- Display products that are still available (that is, hide those that have been paid for or are reserved)
- Update product information, such as price, photo, and description
- Have no cost to keep the site running
One really cool thing about these days is that many products are available for free for smaller projects. I took advantage of this to combine the ones I use most into one solution that fulfilled all the requirements.
Google Sheets
From any Google account, it’s possible to create online documents. Google Sheets is an online spreadsheet management software. With it, you can create, share with others, and publish spreadsheets.
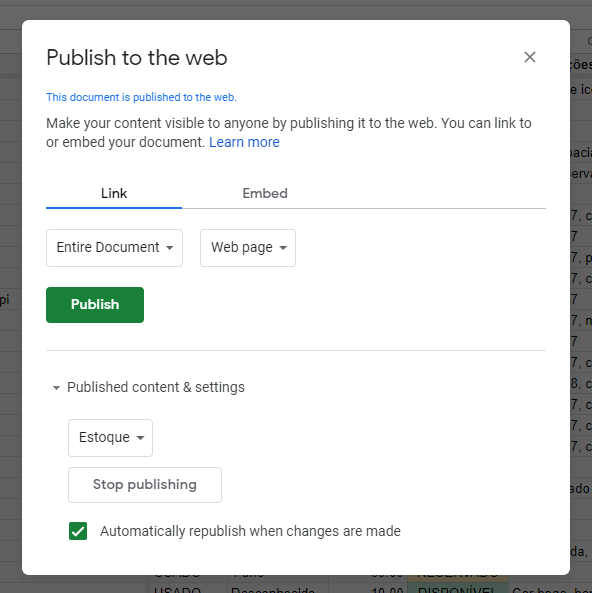
To create a new spreadsheet with your Google account, go to sheet.new. After adding the content, go to File > Publish to the Web. Choose the CSV format and the tab you want to publish. When you click publish, a link similar to this will be generated:
https://docs.google.com/spreadsheets/d/e/<sheet_id>/pub?gid=0&single=true&output=csv
Ready. Back to the environment where our project is, let’s create an environment variable called SHEET_URL. This way, we don’t expose the URL of our CSV in our code. Later we’ll configure it on GitHub as well.
Hugo Data Templates
One of the most popular static site generators today is Hugo, developed in Go. Besides being very fast, Hugo has an active community and many features, ranging from support for custom functions to JavaScript and SASS and SCSS file processing.
An interesting feature for those who want to create a quick site from a data source, whether a file or a URL, is Data Templates. It’s possible to generate a page with data from a local file or a URL, in JSON, CSV, and YAML formats. That said… why not generate a static site from an online CSV? We continue from here assuming you already have a configured Hugo site.
With Data Templates, it’s possible to generate a page from entries in a local file (in the data folder to be created at the project root) or from a URL. Note that it’s one page and not multiple pages. But to get around this problem, you can create a script to generate these pages using archetypes (skeletons for posts). This topic will be left for another time! :)
In my case, I wanted to generate multiple thumbnails from the content of my spreadsheet - a perfect case for Data Templates. A Hugo site has predefined layouts; the list.html file, for example, displays a list of post thumbnails. To use the spreadsheet data in a list of thumbnails, I modified the layout of the list.html file. With Hugo, this is the way to override the layout of a template: just add the desired file to the layouts folder following the same structure and pattern of the template used.
Now here’s the trick: I wanted to keep some publications that I already had in markdown and also generate thumbnails from the CSV. That’s why I kept the initial structure of the file and below added a very similar structure that would generate the content I wanted.
To connect with the online CSV, I needed to read the environment variable (which contains the URL) and then use the getCSV function provided by Hugo. This function will access the URL or local file and make it available. Just pass the separator (in my case comma ",") and the URL as arguments. The return is the index and content of the line. Simple as that.
  {{ $url := getenv "SHEET_URL" }}

  {{ range $i, $row := getCSV "," $url }}
To access the content of the columns, just use the index function. Example:
    {{ $item := index $row 1 }}
    {{ $estado := index $row 2 }}
    {{ $tempo_de_uso := index $row 3 }}
    {{ $preco := index $row 4 }}
Does this mean that every time this page is accessed, Hugo will fetch information from this URL? No. It means that whenever the site is generated, this URL will be accessed and, based on its data, the list.html page will be created. We’ll see later how to force the data to be updated.
Images
Well, and what to do when we want to add images?
Continuing in the same spirit of updating the content of the site without depending on modifications to the repository, I adopted Google Photos as a tool to store the images. When opening an image, just right-click and then click on “Copy image address”. This is the public URL of the image, which can also be added to your spreadsheet. Link example for an image that is in Google Photos here.
When reading the image from the spreadsheet, you will have a public link to it. Then just add it to the HTML code of list.html.
        {{ $imagem_capa := index $row 7 }}
        {{ $instagram := index $row 8 }}
        {{ if $imagem_capa }}
        <a href="{{ $instagram }}" title="{{ $item }}" class="box-masonry-image with-hover-overlay with-hover-icon">
          <img src="{{ $imagem_capa }}" alt="{{ $item }}" class="img-responsive">
        </a>
        {{ end }}

In this image, the items “Como Funciona” and “Doe você também” are new posts, and the others are just thumbnails from the online spreadsheet.
Netlify
I often see someone on Twitter saying, “How did they not invent something like Netlify before?”
On Netlify, you can host your static site for free. Additionally, it has integration with Github - meaning: the code lands in your main branch and it’s already online. The integration is not just limited to that: if you create pull requests, you’ll have at your disposal a site with a preview of the changes you’re proposing. Pretty cool, right?
I can no longer hide that I love the service, but there’s one more feature that makes Netlify an important piece in using online spreadsheets as a backend for a static site: build webhooks. Just by accessing a URL, we can initiate a new deploy to Netlify. This means that, for every time we want to regenerate our site, we can do it just by accessing a URL.
There are limits in the free plan for usage, but I imagine they are more than enough for small projects:
-
Bandwidth: 100GB per month
-
Execution time to generate the complete site: 300 minutes /month
-
Unlimited sites
To deploy your site to Netlify, just log in with your account and connect the repository on GitHub. Additionally, you can make customizations with a netlify.toml file on your Hugo site. Learn more about Hugo integration with Netlify here. Once the repository has been connected, you can already access the Build Webhooks. Let’s get the address of the Webhook for deployment - we’ll copy it to the NETLIFY_DEPLOY_HOOK environment variable soon.
Before the grand finale… Let’s configure the environment variables on GitHub
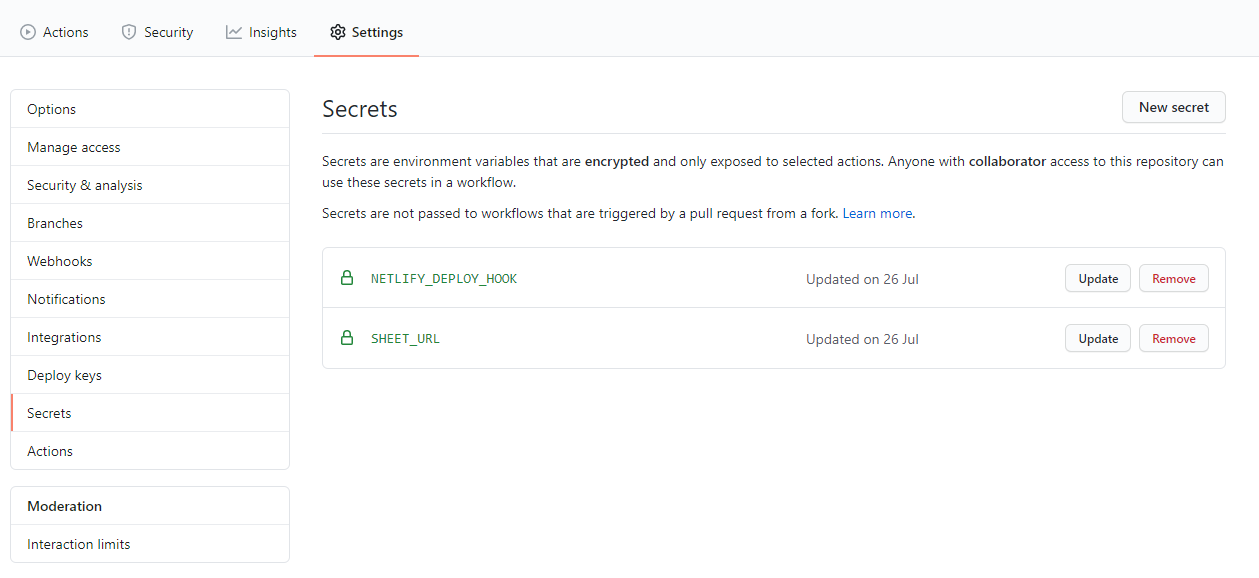
We need to configure two environment variables to make everything work: SHEET_URL and NETLIFY_DEPLOY_HOOK. To do this, just go to your repository’s settings and click on Secrets > New secret. After adding them, they will be available in all deploys.
GitHub Actions
We already know how to access data from an online spreadsheet within Hugo, where to deploy the site for free, and how to initiate a build to generate a new site. What’s missing? Scheduling times for new site generation (unless you want to keep accessing a horrible URL every time).
GitHub Actions is the newest CI tool beloved by developers (according to my not-at-all biased research institute). With GitHub Actions, you can have a continuous integration tool, run tests, release versions, on different operating systems, and much more on your GitHub.
A cool feature of GitHub Actions is scheduling: just what we needed. For this, I just needed to create a new workflow:
name: Trigger Netlify Build
on:
  schedule:
    # At the end of every day
    - cron: '0 0 * * *'
jobs:
  build:
    name: Request Netlify Webhook
    runs-on: ubuntu-latest
    steps:
    - name: Request deploy to Netlify
      env:
        NETLIFY_DEPLOY_HOOK: ${{ secrets.NETLIFY_DEPLOY_HOOK }}
      run: curl -X POST -d {} "$NETLIFY_DEPLOY_HOOK"
With it, we schedule a new site generation and deploy to Netlify for the end of each day by just making a POST to the Netlify hook responsible for the deploy. Simple as that.
That’s all for today, folks
Using Data Templates was something I always wanted to do; it’s a very cool feature that will probably evolve to the complete generation of static sites through online sources soon. I hope you enjoyed this text and that it will be useful to you at some point! All the code is available here.
Unfortunately, the opportunity to explore this functionality came when my sister passed away after fighting cancer. We tried to continue her legacy of helping people with this bazaar. If you want to know how to help cancer institutions in Feira de Santana or learn a little more about this initiative, visit www.bazardogirassol.com.br.
Rest in peace, Mila. 🌻